Orinj version 7.0.0
The Orinj single wave view works with individual wave.
Open a wave
To open a wave file, click on File and then on Open in the Orinj menu. Browse to the wave and open it.
If you want to open a wave that you used recently, you can click on File and then on Recent in the Orinj menu. If the wave is listed under the Recent command, click on it to open it.
If you try to open an AIF file, AU file, or a non-PCM wave file (such as A-law and U-law compressed wave files), Orinj will attempt to convert this file to a PCM file. A new file will be created and the original file will not be changed.
Close a wave
To close the wave that is currently displayed, click on File and then on Close in the Orinj menu.
Save a wave
Since Orinj does not change the sound data of wave files but always creates a new file instead, saving a wave is not necessary. If you want to save the wave under a different name or in a different place, click on File and then on Save As in the Orinj menu.
Choose which wave to display
To choose a wave to display, click on Wave and then on Select in the Orinj menu. You will see the following dialog.
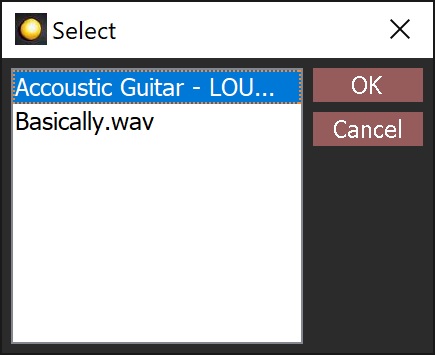
All wave files that are currently open will be listed in this dialog. Click on the one you want to display and click OK.
Play, stop playback, pause, fast forward, and rewind
To play your wave file, click on the play button ( ) in the player toolbar at the bottom of Orinj, or click on Session and then on Play in the Orinj menu. To play only what is visible on the screen, click on the play screen button (
 ) in the player toolbar at the bottom of Orinj, or click on Session and then on Play Screen in the Orinj menu. Once the play cursor (the yellow vertical line) reaches the end of what is visible on screen, playback will stop. To play a portion of your wave file in a loop, select that portion and then click on the play loop button (
 ) in the player toolbar at the bottom of Orinj, or click on Session and then on Play Loop in the Orinj menu. To make a selection over the wave file, first click on the select mouse pointer (
 ) in the pointer toolbar at the bottom of Orinj, then click on the wave on the screen, and then drag the mouse to the left or the right.
To stop the playback of the wave file, click on the stop button ( ) in the player toolbar at the bottom of Orinj, or click on Session and the on Stop in the Orinj menu. The play cursor will return to where playback started.
To pause playback, click on the pause button ( ) in the player toolbar at the bottom of Orinj or click on Session and then on Pause in the Orinj menu. After you pause playback, you can either resume playback or you can stop it.
To fast forward, click on the fast forward button ( ) in the player toolbar at the bottom of Orinj. You can fast forward only during playback. When you release the fast forward button, playback will resume. To rewind playback, click on the rewind button (
 ) in the player toolbar at the bottom of Orinj. You can similarly rewind only during playback and playback will resume when you release the rewind button.
If you want to fast forward to the end of the wave file, click on the fast forward to end button ( ) or click on Session and then on Fast Forward To End in the Orinj menu. To rewind to the start of the wave file, click on the rewind to start button (
 ) or click on Session and then on Rewind To Start in the Orinj menu. You can fast forward to the end or rewind to the start both during playback and otherwise.
Change the volume or pan of the wave
To change the volume or pan of the current wave, use the volume and pan controls in the track control panel to the left of the wave. The actual wave file will not be changed, but the volume and pan will be adjusted during playback.
To change the volume or pan for portions of the wave, use volume and pan envelopes. See Orinj Working with session tracks for more information on envelopes.
Cut a wave
To cut a portion of the current wave, select that portion and click on Wave and then on Cut in the Orinj menu. Orinj will create a new wave and the original wave will not be changed. (If this cutting splits the wave in two, two new wave files will be created).
Apply envelopes and effects
When you add effects or change the volume or pan, these changes are computed during playback and do not actually change the original wave file. If you wish to permanently apply these to the wave and actually modify the sound data of the wave, click on Effect and then on Apply Envelopes and Effects in the Orinj menu. Orinj will create a new wave file. The original wave file will not be changed.
Choose the output device
To choose the output device that will play sound data, click on Session and then on Output Device in the Orinj menu. You will see a dialog that lists available output devices. Select the one you want and click OK.
Change the audio format of the wave
To review the audio format of the current wave, such as its sampling rate, sampling resolution, and number of channels, click on Wave and then on Audio Format in the Orinj menu. Change these properties if you want and click OK when you are done. If you make changes, Orinj will create a new wave file with the specified audio format. The original file will not be changed.
Examine the frequency content of a wave
To examine the frequency content of the wave, click on Wave and then on Frequency Content in the Orinj menu. You will see a dialog that shows you which frequencies are prominent in the wave file.
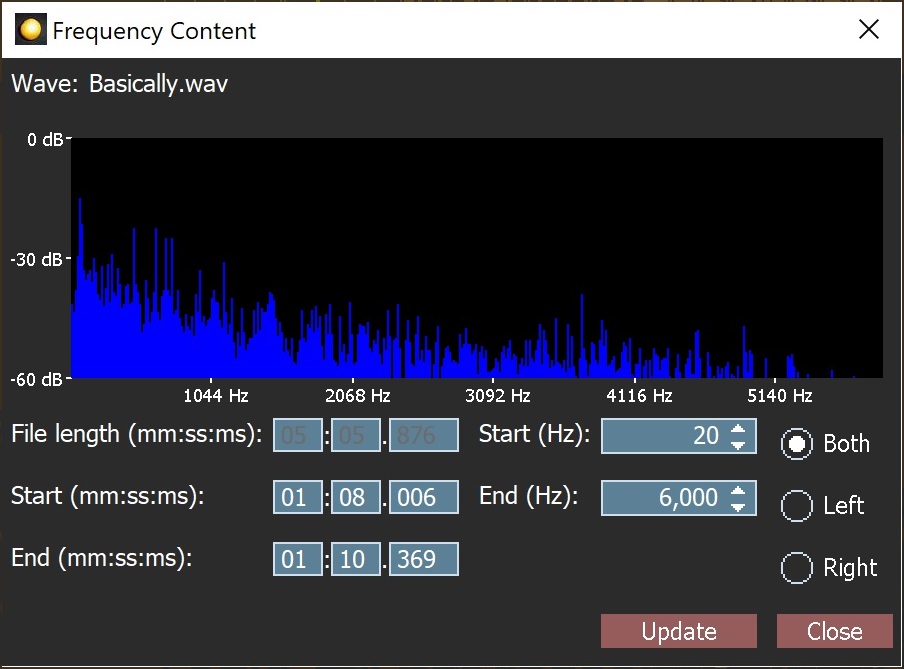
Choose the interval of time, the interval of frequencies, and the channel that you want to examine and click on Update.
Pitch shift a wave, stretch a wave, auto tune a wave, or reduce the noise in a wave
To change the pitch of a wave without changing its tempo, click on Wave and then on Pitch Shift in the Orinj menu. To stretch or shrink a wave without changing its pitch, click on Wave and then on Stretch in the Orinj menu. To auto tune a wave, click on Wave and then on Auto Tune. To reduce the noise in a wave, click on Wave and then on Reduce Noise.
Pitch shifting, stretching, autotuning, and noise reduction work similarly. These effects first determine what frequencies exist and with what amplitude at many points in time in the wave. Then:
- The pitch shifting changes these frequencies and then creates a new wave from the computed frequencies.
- The stretch or shrinking then creates a new wave with the same frequencies, but at different times.
- The autotuning, similarly to the pitch shifting, adjusts the frequencies and creates a new wave from the computed frequencies.
- The noise reduction subtracts the frequencies present in the noise sample and creates a new wave from the computed frequencies.
These effects use several similar parameters.
- Frequencies: This drop-down box determines how many frequencies will be analyzed. If it specifies 1024, for example, the effects will determine the amplitude of 1024 evenly spaced frequencies in the frequency spectrum. The effect typically becomes more precise with more frequencies, but also slower. Moreover, with more frequencies, the part of the wave that will be analyzed will be larger. 1024 frequencies means that the effect will analyze 1024 samples, which is equal to 2.3 milliseconds in a wave recorded with at the sampling rate 44.1 kHz. If this segment of analysis is too large, the effect may actually become less precise if the wave changes quickly.
- Segment length (ms): As the effect shifts over the wave (over time), it analyzes a part of the original wave and creates a part of the new wave. How large the part is that is being analyzed depends on the previous parameter (Frequencies). How large the part is that is being created depends on this parameter. In general, the shorter this parameter is, the more precise and also slower the effect is. This parameter is especially important in waves that change quickly, such as drums.
- Overlap: Since waves change constantly, each effect must analyze overlapping pieces of the wave and crossfade the result. If there is no overlap between two parts, the newly created parts can be very different and there will be audible pops between them. The effect becomes more precise, but also slower as the overlap increases.
The following are the Orinj autotuning dialog and further notes on autotuning.
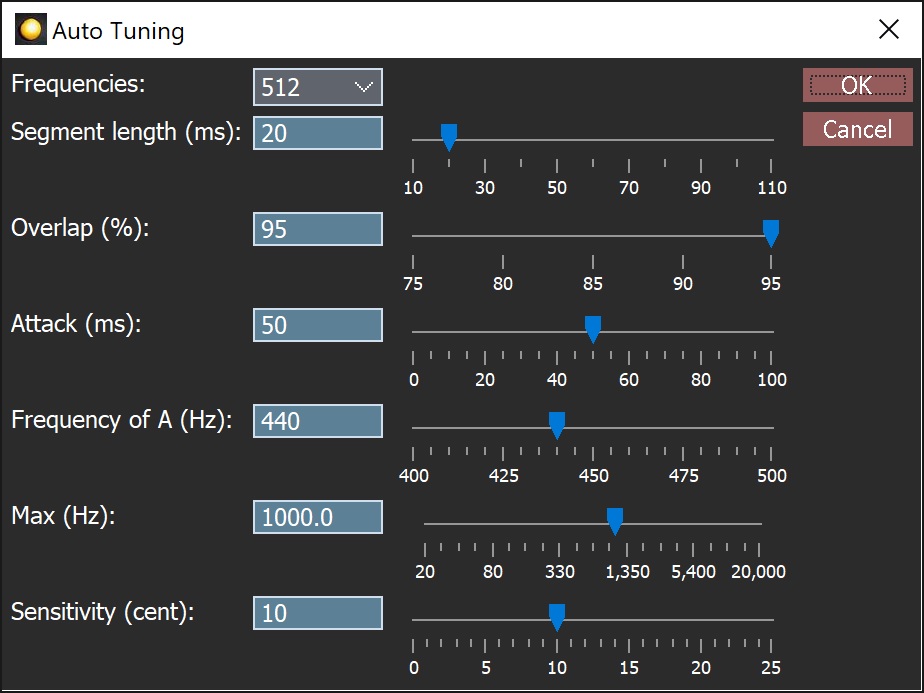
- Autotuning uses the equal tempered chromatic scale. The frequencies of notes is fully defined by the frequency of A specified in the autotuning dialog. If, for example, A is 440 Hz, then A# is 466.16 Hz, B is 493.88 Hz and so on. Similarly, if A is 440 Hz, then Ab is 415.30 Hz, G is 392 Hz, and so on (see Frequency of notes and Equal tempered scale).
- Autotuning tunes to the chromatic scale and not to a scale defined by the user. That is, if the signal is close to C, it will be tuned to C, independently of whether C is on the scale in which the recording is made.
- When tuning, not all frequencies in the signal are changed. This is done to deal to some extent with formants.
The following are the Orinj noise reduction dialog and further notes on noise reduction.
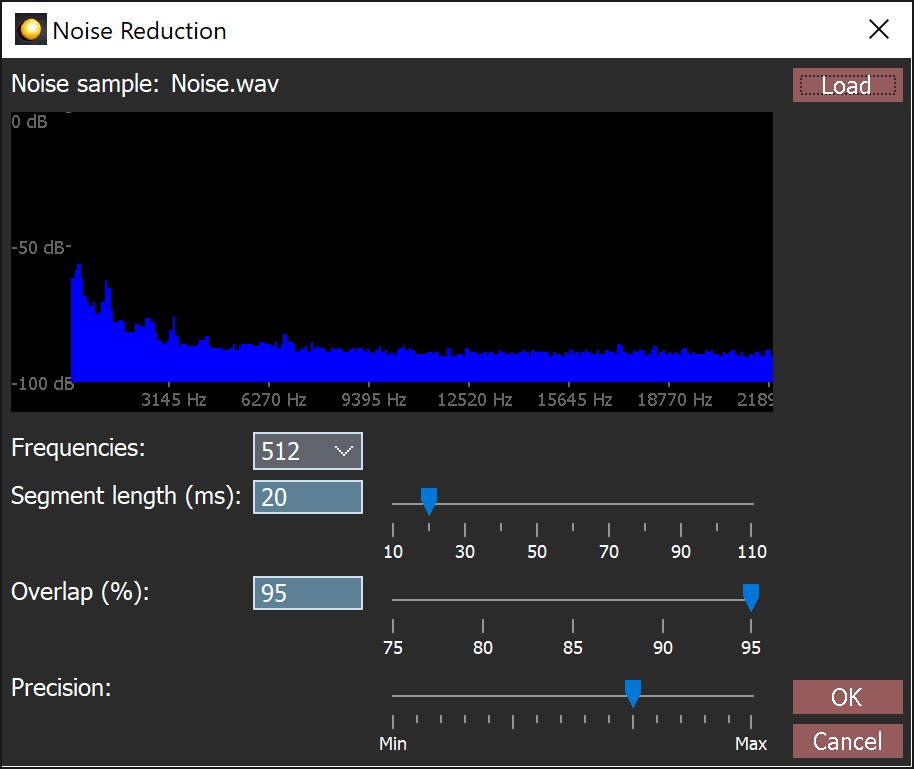
- A noise sample must be loaded in the noise reduction, so that the noise reduction can analyze the sample and determine how to process the wave. A good noise sample is usually one that is a piece of the wave with noise. Press the Load button to load a noise sample.
- The precision parameter determines how detailed the analysis of the noise will be. The noise reduction becomes better, but also slower with higher precision.
Change the meta properties of a wave
To change the meta properties of a wave, such as its author or copyright info, click on Wave and then on Meta Properties in the Orinj menu.
Reverse the wave file
To reverse the wave file so that it sounds as if it is played backwards, click on Wave and then on Reverse in the Orinj menu.
Split a stereo wave file
To split a stereo wave file so that each channel becomes a separate mono wave file, click on Wave and then on Split Stereo Wave in the Orinj menu. Two new files will be created and opened in Orinj. The original file will be preserved. The file containing the left channel sound data will remain visible.
Replace sample
The Replace Sample command of the menu in the single wave view is used to replace the hits in a drum track with a sample hit. Use this command, for example, to replace a hollow kick in a kick drum track with another kick. This command finds the drum hits in a track because it measures the amplitude of the track at different points. Thus, this command will not work for other instruments.
Click on Replace Sample in the menu. In the dialog that pops up, click on the Browse button to specify the new drum sample that should be used. Specify the amplitude detection threshold. Only hits with amplitude above this threshold will be replaced. Specify the approximate maximum peak volume of the original signal. This is only approximate. It is used to adjust the new samples to match the original volume. Finally, specify how far apart should separate hits be, to be recognized as separate hits.
Add new comment